Tech Tip #5 - Notching Base Panels for Toe Kick
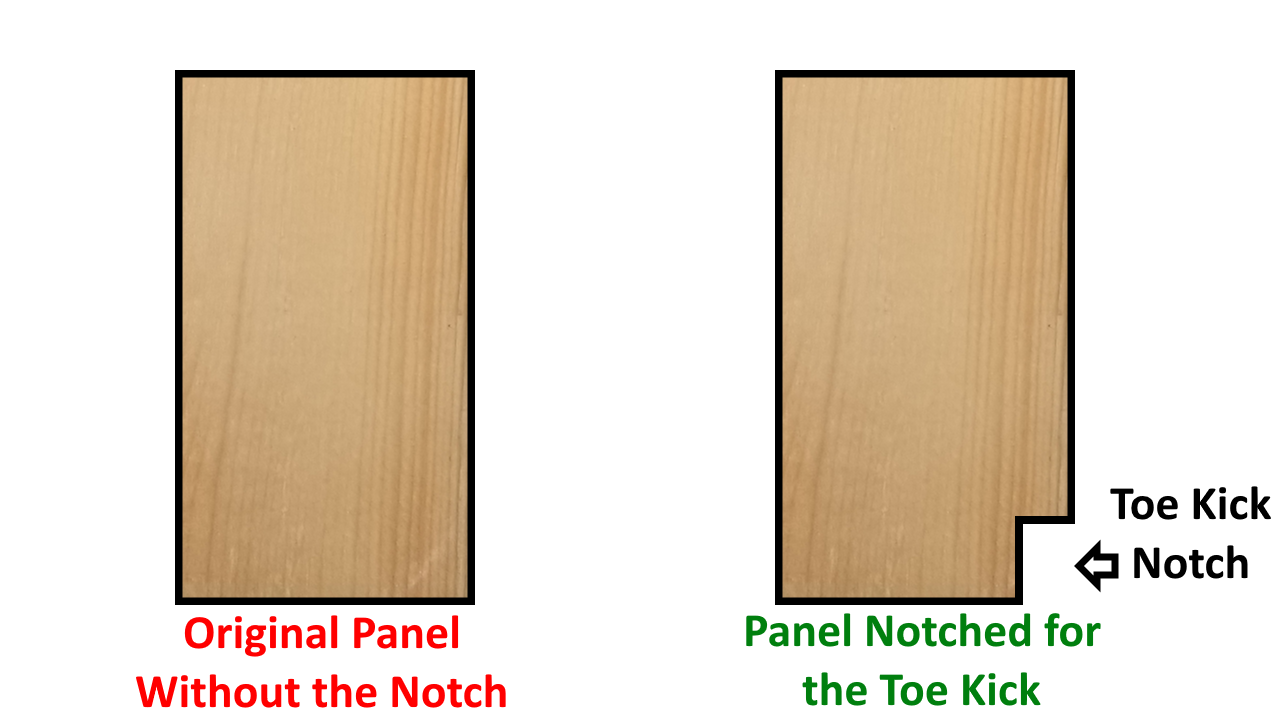
Base panels are a fact of life that every installer must deal with. Sometimes they show up in the middle of a design next to a dishwasher or at the end of a run of base cabinets. Whenever a base panel is placed into an angled corner or somewhere in the middle of a cabinet run, it needs to be notched for the toe kick. I can't tell you how many times I’ve seen installers run them straight to the floor, creating another way for people to stub their toes.
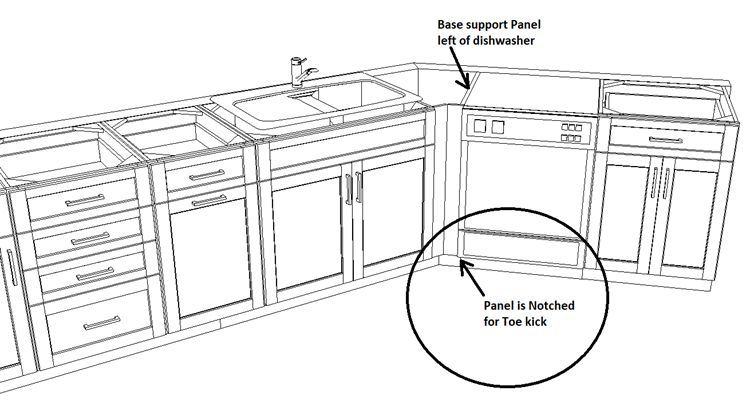
In the image below, the designer has a support panel next to a dishwasher to handle the weight of the countertop and keep the dishwasher secured to the corner. Before the panel is installed, it's a good idea to the notch the bottom of the panel so there's room for your toes.
Now compare this to the second example, where the panel is not notched for the toe kick. Not only does it look wrong, but your customer's toes are also at risk.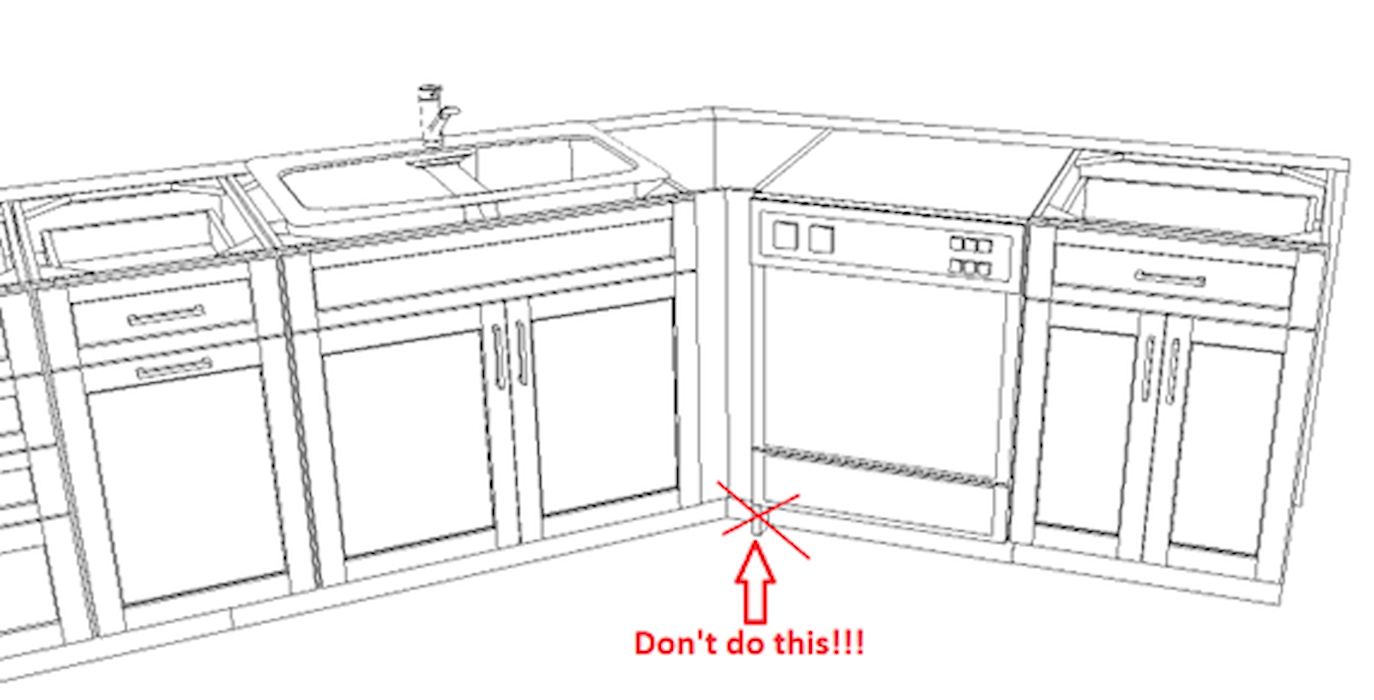
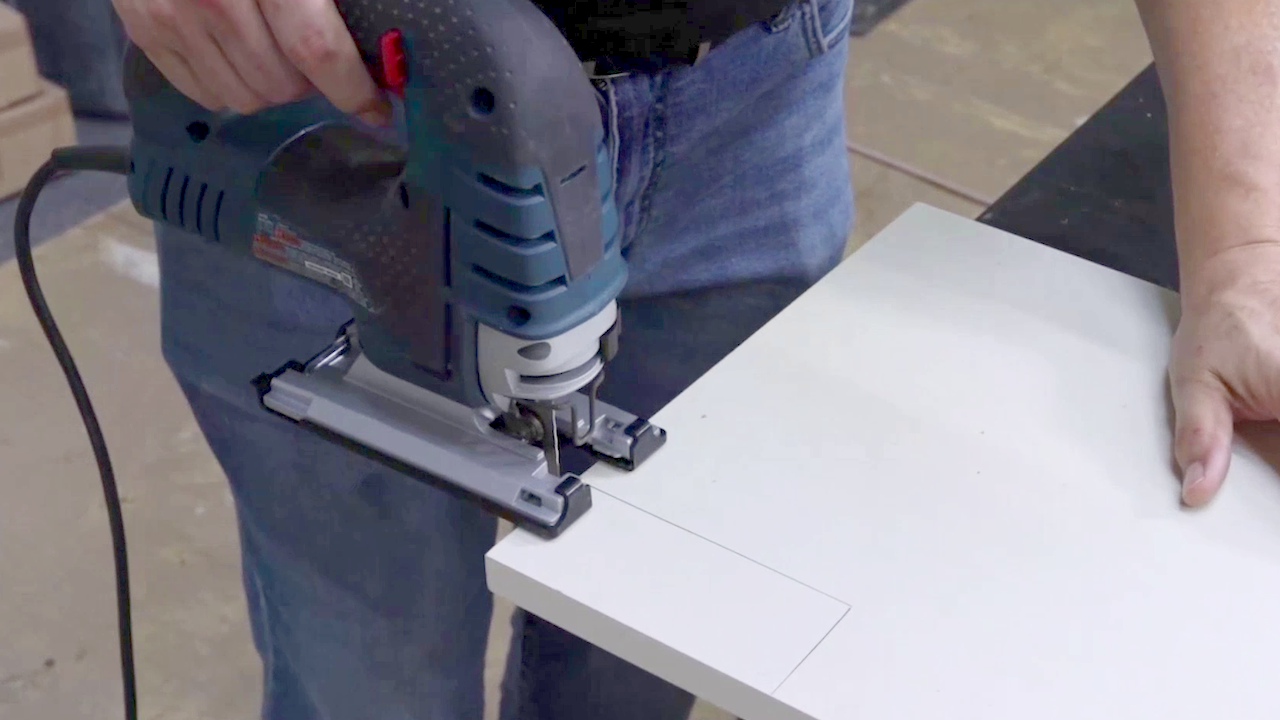
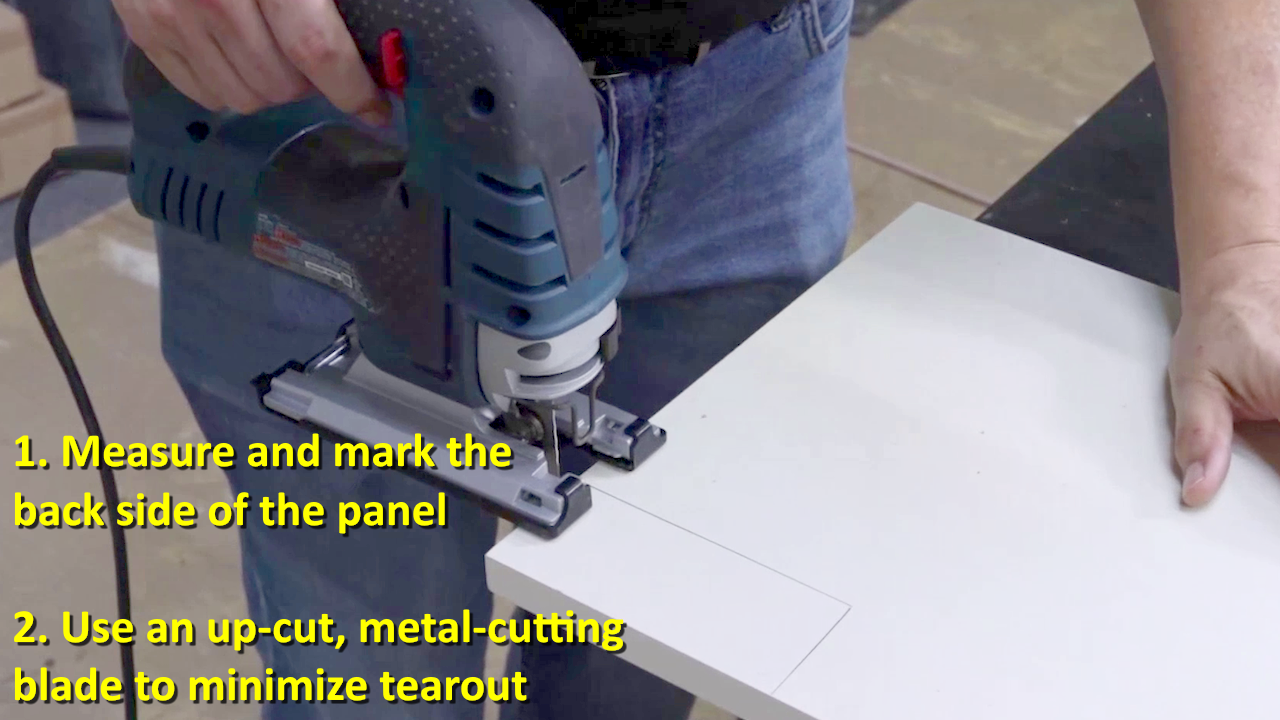
Notching a base panel is simple. First, measure the height and depth of the toe kick on one of your base cabinets, then draw it on the panel and cut along the line with a jigsaw. Make sure you cut on the back side of the panel and use an up-cut, metal-cutting blade to reduce chipping.
This rule applies to all panels that are installed at base depth, including tall panels and island panels. If you look at the design and think a panel should be notched for the toe kick, you are probably right, so break out your jigsaw and make the cut!
If you're looking for a tutorial for how to use a jigsaw, we made a video on our YouTube channel, Cabinet Talk, where we teach you how to use a jigsaw to make accurate cuts and minimize tearout. You can find that video by clicking here. We also have over 20 detailed video lessons on all the tools you need to install cabinets in our Cabinet Bootcamp Course.
Thank you for reading, and keep building!
—The Cabinet Academy Team